Home » Frugal Food

Category: Frugal Food

Delicious foods and frugal recipes from some of our favorites!

5 Delicious Budget Friendly Thanksgiving Foods

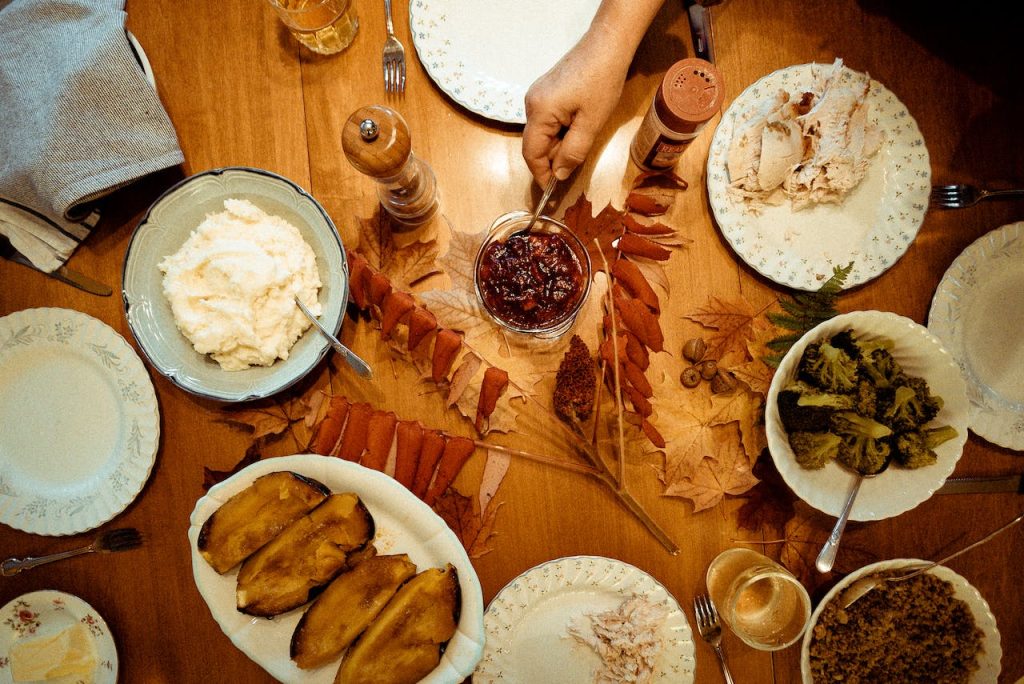
With the fall comes the beginning of the big holiday season. And next up just happens to be Thanksgiving. While this holiday may not get as expensive as the following holidays, it can still get pretty pricey. This is especially true if you happen to be the host and aren’t having a potluck style Thanksgiving. Luckily, we’ve found 5 delicious budget friendly Thanksgiving foods that have helped keep our wallets and our bellies filled.

#1 CRANBERRIES

Cranberries tend to be fairly traditional in American Thanksgiving spreads. These little red berries are not only a pretty healthy addition to your Thanksgiving meal, but are very cost-effective also. Even if you choose to purchase them in a can, they’re pretty budget friendly.

Typically, a can of jellied or whole cranberries can cost anywhere from $.95 to $1.60, depending upon the brand, location, and store. These prices are for a 14oz can, and they certainly have a lot of added sugar. Due to that and the added cost, this isn’t our preference. But they will do the trick if you don’t feel like making your own cranberries from scratch.

If you can manage making your own cranberry sauce, it’s certainly the healthier and more cost effective way to do it. I just found a 12oz bag of organic cranberries for $1.98. This bag of cranberries will make us a heck of a lot more than one 14oz can and save us more money too.

#2 GREEN BEANS

Green beans are a phenomenal vegetable to add to your Thanksgiving food selection. They are not only really budget friendly but extremely nutritious also. Green beans contain decent amounts of Fiber, Vitamins A, C & K, Beta-carotene, Folate and Potassium, so they are a nutrient power house. Adding both these and cranberries into your Thanksgiving spread can help boost your immunity for the winter, which is a bonus for all of us!

Recently, I’ve found a 12oz package of fresh green beans for around $2.79, or a 14.5oz can for around $.98. While the can may seem cheaper, a lot of that is water weight. Plus, the can contain around 3 servings and the fresh serves around 4-6.

One of our favorite ways to make green beans for the holidays is by sautéing them with some olive oil and spices. This is quick, easy and really flavorful and only costs us approximately $3.07 for the whole batch. Plus it serves all 7 of us nicely.

#3 POTATOES

Potatoes are something that pretty much everybody loves. They’re easy to make in so many different ways for added diversity. And they can be extremely healthy as a added bonus, depending upon what you put in/on them. Which is just more proof that healthy food doesn’t really have to cost more money.

The easiest and most budget-friendly way to make them is either mashed or roasted. With this specifically in mind, I prefer to use either Yukon Gold or Red potatoes. Finding a 5lb bag of Yukon Gold potatoes for under $5 seems pretty easy to run across. For mashed potatoes you just need to add butter, milk and any spices of your choice. If you are roasting the potatoes, olive oil and spices are the only additions needed.

Depending upon what ingredients you use and how much of each, the cost will vary. But for us, we can turn a 5lb bag of potatoes into delicious mashed potatoes for a little over $.50 per person. And at that price, I am definitely going to have seconds!

#4 TOFFEE

While I love the main Thanksgiving course, I certainly can’t forget about dessert. And for many years now toffee has been one of my favorite things to make. It’s not only horribly addicting because it’s so delicious, but it’s also really east to make and cost effective to boot.

Here is my simple and easy toffee recipe (which can be made vegan if you substitute vegan butter for the regular version):

  • Unsalted Butter (1lb) – $2.99
  • Sugar (16oz) –  $2.49 for a 4lb bag (9.5cups) = $.52
  • Water – FREE! (usually)
  • Pink Himalayan Sea Salt (1tsp) – $1.99 for a 3.3oz (16.43tsp) jar = $.12
  • Semi-Sweet Chocolate Chips (12oz)– $2.12

TOTAL: $5.75

Put everything except the chocolate chips in a large pot. Stir constantly while the pot raises to a boil. Once it begins boiling, keep stirring until a candy thermometer reaches 300 degrees. This is approximately 8-12 minutes, depending upon your pot and stove. Once it reaches that point, pour the toffee into a sheet pan to cool. Add chocolate chips to the top of the toffee and spread around to form a thin layer. Let cool on the counter to room temperature and then pop it in the refrigerator for a couple of hours to get a hard crack. This stuff is so freaking delicious that we all start eating it right out of the pan!

While the total may sound like a lot, it’s really not. I get a huge sheet pan full of the stuff and it can easily serve 10-12 people.

#5 PUMPKIN PIE

Another dessert favorite about Thanksgiving tables is pumpkin pie. Just like the cranberries and the green beans, pumpkins also happen to be really good for you. They contain a good amount of Magnesium, Vitamin A, Iron and B Vitamins. So not only is pumpkin pie healthier for you than some of the other dessert options, it’s also delicious and pretty easy on your wallet. Trifecta for the win!

Typically, the crust is the most expensive part of the pumpkin pie. Therefore, if you can make your own crust, it’ll be more cost effective. But if not, there are a plethora of pie crust choices starting at $1.99 for each one.

For one of the best, and easiest pumpkin pie recipes, the breakdown is the following:

  • Pure Pumpkin (15oz can) = $.95
  • Light Brown Sugar (3/4cup) – $2.29 per 2lb bag (4cups) = $.43
  • Eggs (3) – $.99 per dozen = $.25
  • Cinnamon (1 1/2tsp) – $5.99 for 7.12oz (42.72tsp) = $.21
  • Salt (1/2tsp) – $1.99 for a 3.3oz (16.43tsp) jar = $.06
  • Ginger (1/2tsp) – $2.79 for a .7oz jar (4.2tsp) = $.33
  • Allspice (1/2tsp) – $.78 for a .65oz jar (3.9tsp) = $.10
  • Nutmeg (1/4tsp) – $2.99 for a .9oz jar (5.4tsp) = $.14

FILLING TOTAL: $2.47

TOTAL W/CRUST: $4.46

Since a regular sized pumpkin pie serves approximately 8 people, you’re looking at about $.55 per slice. That’s much more delicious than any slice of pie you’d get out at a restaurant!

budget friendly THANKSGIVING FOODS summary

Overall, there are plenty of budget friendly Thanksgiving foods that can adorn your table this year. None of these 5 foods will break the bank or your pants. So if you want to keep your wallet fat and your waistline a little smaller, think about incorporating these into your Thanksgiving meal. Heck, at these prices, you could easily make these part of a regular diet and still be saving money. What’s not to love?

What are some of your favorite budget friendly Thanksgiving foods to incorporate at your table?

How to Make the Most of a Winter Garden Now

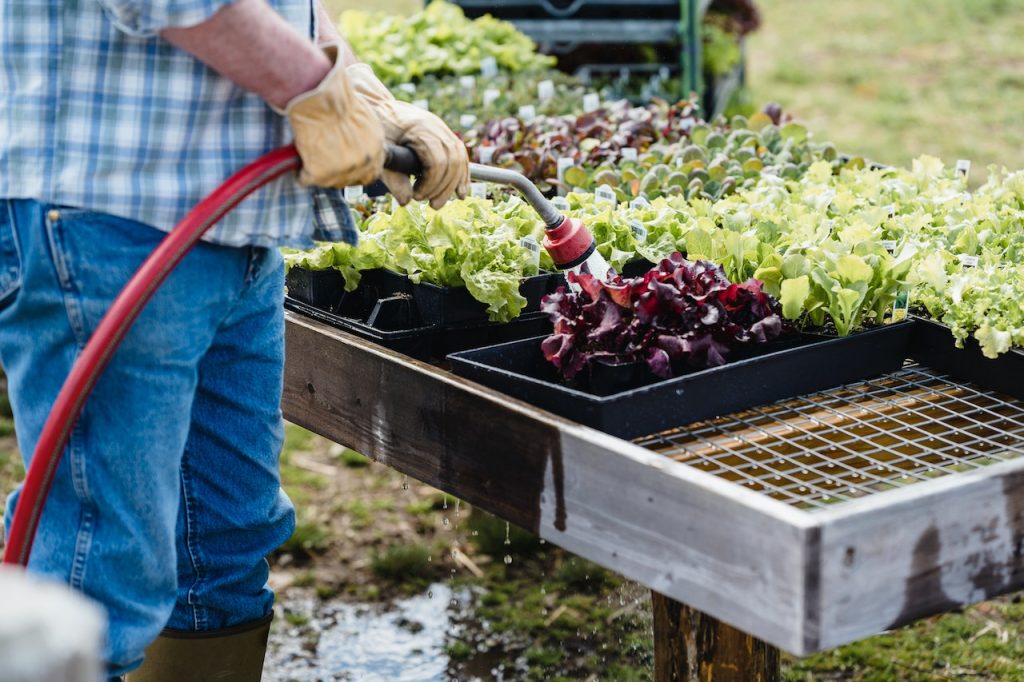
Since we are now finally into the fall season, the weather has finally started to cool down. But it also means that we’ve started to notice less fresh produce at our local farmer’s markets. Since we have been actively working on creating our own garden this year, this next season will be a new challenge. Our hope is that we can make the most of a winter garden by starting it now. And in turn  save us some money on food and help us eat healthier throughout the cold season.

PREPARing for a winter garden now

When preparing for a winter garden, the first thing to determine is which hardiness zone you live in. This is important because each zone has different first frost dates. All crops are organized by first frost dates, so this is important to know ahead of time.

Since each crop needs a certain amount of light, water and growing time to reach maturity, you want the crops to reach maturity before your first frost hits.

Once you have your approximate first frost date, then you should determine where you want to plant your winter crops.

Each crop will have slightly different requirements for the following:

  • Sunlight
  • Water
  • Spacing
  • Soil pH
  • Nitrogen content
  • Phosphorus content
  • Potassium content

Your soil will have varying degrees of vitamins, minerals and nutrients so it might be very beneficial to have it soil tested. You can send your soil off to be tested for free (I’ve done this many times before). Or you can purchase a soil testing kit to use at home instead, if that is your preference.

Since I live in North Carolina, we can send our soil off to the Department of Agriculture for a very in depth soil test. The results of these tests tend to be a lot more in depth than the in home tests, which I happen to be a big fan of. However, it does definitely take much longer to get the results back than a home test would. So this will depend upon how accurate you want to be with your garden, as well as if you’re looking at different areas around your yard to plant.

WINTER CROPS TO PLANT

Once you have determined what your soil makeup is and how much sunlight you get, choosing the crops is the next step. Obviously, don’t choose crops for your winter garden that aren’t things you would regularly eat. Unless you want to branch out and try new things (which is what we love to do!). I would suggest including crops that might be used more for seasoning and flavor enriching also, as these “spices” can certainly kill your grocery budget if you’re not careful..

After making your list of the the more common crops you like, then add in the garden potentials that you may eat more of if you had it available. Once you have your list of potential crop candidates, the next step is to narrow them down by how long they take to reach maturity.

Most seeds will tell you how long they take, on average, to reach maturity. So you want to make sure you plant the crops that take the longest to mature first.

6 – 8 WEEKS TO MATURITY

This is the time frame you should be looking for during this time of the year in order to reap the most benefits from your winter garden.

Some of the most common winter crops in this maturity window are:

  • Basil
  • Bush Beans
  • Collard Greens
  • Kale
  • Kohlrabi
  • Leaf Lettuce
  • Mustard Greens
  • Radishes
  • Spinach
  • Swiss Chard
  • Turnips

WINTER Garden SUMMARY

Overall, even though we are starting to see less and less fresh produce at this time of year, there are still some things we can plant. Proper planning is the best way to start any new project, and a successful winter garden is no different.

It’s helpful to determine your hardiness zone first and then get your soil tested. After that, start narrowing down the list of winter crops that you’d like to grow and where they might grow best in your yard. Once you’ve chosen your crops, make sure you have enough time for them to reach maturity prior to the first frost in your area. After that, it’s time to enjoy the fruits of your labor and hopefully save yourself some green this winter also!

Have you begun planting your winter garden yet? If so, which ones have you planted and when?

The 2 Best Ways to Get Great Deals on Food

Since food costs only seem to be getting higher and higher each year, reining that in a bit can really affect our budget. Even if we are able to save just a little bit of money each week, it can really add up over time. But, we don’t want to skimp on the quality of food we choose either. Forgive us, we’re picky! That being said, we’ve figured out a couple of really good tricks to help out. Here are the 2 best ways to get great deals on our food, in our opinion.

#1. GROCERY STORE Deals on Food

The first place I always look for good deals on food is the grocery store. Unless, it happens to be a Saturday and I can hit up our local farmer’s market. The smaller one near us has farmers that are close by and all of them use organic practices. Plus, we can get a heck of a lot of produce from them for much less than the grocery store. But, since we aren’t able to make it each week, the grocery stores are our second choice.

While they are more expensive than our local farmers, we have been pretty lucky to find some good, organic produce at most of them. Most grocery stores have weekly deals on different products, some of which are usually produce. Not everything these stores sell will be healthy food though. So just remember to keep an eye out for local organic produce whenever possible. By keeping your diet full of healthy foods, it can only benefit both in quality of life and your wallet (hopefully).

Look for grocery stores that specialize in more local products and/or products from other countries. A lot of other countries can have better quality standards with their food than we do (sadly!). Due to this, it would benefit you to look for those items. Also, these items tend to cost less than some of the products grown here.

Some of the best grocery store options we’ve found the best deals at include:

If you have access to any of these, they are who I would suggest starting with. However, don’t forget to look for your smaller, independent grocery stores that specialize in specific cuisine. I’m able to get a lot of local organic produce from our smaller coop at Weaver Street, and they give us a discount on produce specifically each week. When I’m looking for rice, I prefer the Asian or Indian markets because they have a much wider variety. And I can get huge bags for a fraction of what I would pay in a regular grocery store. Sometimes getting specific things at specialty stores are well worth the extra trip. This is especially true when I can buy things in larger quantities that will last longer to offset the extra drive.

#2. DEALs on food WEBSITES

Aside from the grocery stores, I like to peruse websites that offer deals on food. Some of these websites will offer deals on grocery stores and restaurants, and some are just one or the other. Either way, they are a good place to take a look in case they have something that may work for you to help reduce your overall food costs.

Out of all the coupon websites we’ve run across, the following are our favorite options for deals on food:

  • Groupon – as one of the largest deal websites in the world, there’s always a ton of choices to choose from. Not only can you search online, but you can also get a deal while you are physically at the restaurant. All you have to do is then show the code to your server when it is time to pay and it discounts your meal. Pretty awesome!
  • Living Social – this one is a direct rival site to Groupon. While they don’t typically have as many deals as Groupon does, they always have a lot. And, as a bonus, they are usually the competitors to the Groupon listings. So we like to check both just to see who is offering the better deal in similar genres.
  • LocalFlavor.com – this site operates the same way as Groupon and Living Social, but it is more for local restaurants as opposed to chains. Plus, you get 25% off your first purchase when you sign up for their daily email with deals. This one we like a lot since we prefer to eat locally whenever possible. And deals at these types of restaurants are definitely much harder to come by.
  • Restaurant.com – this site has deals that never expire, which is one of my favorite things. You can go on there and search by genre or specific restaurant to see what they have. A lot of the deals are similar to paying $10 for $25 worth of food. This is the type of savings can really add up and help our bottom line!

Deals on food summary

Overall, there are a lot of great places that you can find good deals on food. If you have access to a smaller, local farmers market, that’s always the best place to start. After that, the grocery stores is where it’s at. These will definitely cost you less than eating at a restaurant, but typically more than a local farmers market. After these two, looking for deals on food websites is the place to hit for restaurants. Ultimately, following these tips can help stretch your food money even further.

What are some of the best ways you’ve found to get the best deals on food?

How Can You Help Reduce Food Costs by Foraging

With the cost of everything rising dramatically since COVID, food costs are definitely no different. In fact, the average cost of groceries has risen exponentially since 2020. While the average increase annually over the past 20 years has been 2%, in the past year alone it has been over 11%. That’s ridiculous! So, to help counteract that huge rate of inflation a little bit, a lot of people have started to reduce food costs by foraging. And we are no different.

reduce food costs by foraging best practices

If you do decide you want to embark upon a foraging trial to help reduce food costs, there are some best practices to follow. These practices help keep you and your family safe, as well as help replenish the environment you are foraging in.

  1. Know what you are picking before you pick anything
  2. Don’t take more than you plan to consume before the food can go bad
  3. Only collect foods when they are in abundance
  4. Leave plenty of food behind for the animals and to regenerate
  5. Don’t pick rare species, as it may be illegal
  6. Get permission to forage on someone’s land before doing so
  7. Don’t pick anything near highways and roads, as they are typically fairly contaminated

What to forage

Choosing what to forage will be very specific to you. What you and your family like, will have a huge impact on what you choose to forage. Another big factor will be what is available near where you live, or within driving distance. And the last big factor will be what season it is. Certain plants, berries, fruits, nuts, mushrooms, etc. can only be found during certain times of year.

For us, personally, our big focus tends to be in the fungi family. We have a lot of edible species that grow wild around us, so we take full advantage. Overall, here are some of our favorite things to go out and forage for:

  • Chicken of the Woods (Mushroom)
  • Hen of the Woods (Mushroom)
  • Lion’s Mane (Mushroom)
  • Chanterelle (Mushroom)
  • Shaggy Stalked Bolete
  • Wild Dill
  • Wild Green Onions
  • Burdock
  • Purslane
  • Dandelion
  • Blackberries
  • Blueberries
  • Raspberries

For us, we are lucky in that we live in the piedmont area of North Carolina that gets a lot of rain and has tons of foliage regularly. If you aren’t sure what might be available near you, there are plenty of foraging groups you can get involved with. Most of these are on platforms such as Facebook, Instagram or Twitter. But, one of the best sources I have found to take with me when I forage has been the Wild Remedies book. It not only gives me a wide variety of plant life to look for, but also scientific identifiers to make it easier to not choose the wrong species on accident. And, as a bonus, it gives me some delicious ways to cook what we’ve foraged.

where to forage

Once you’ve nailed down what you plan to forage for, then you just need to figure out where the best spots are. A lot of the crowdsourcing groups can help with this. We are a part of a couple of them that post where they find some of their foraging bounty and when. If you aren’t sure where to start though, there is a great website, Falling Fruit, that gives a ton of in depth information about specific species, when and where to find them. It can be a bit difficult to weed through though, so be patient. Here is another good source of information to find some more sources that may be more local to you, as well.

We typically forage at some local parks and hiking trails that aren’t too far away, as well as our own yard since we follow organic practices. One thing I want to caution you about is choosing what you are foraging wisely. A lot of less wild spots will spray herbicides and pesticides regularly, which you don’t want to ingest. And if you are foraging near a roadside, you are bound to get highly contaminated food instead of clean sources. So, the further you can get away from the beaten path, the better.

And when you are foraging, make sure you leave an ample amount of your “prey” behind so that it can feed the wild habitat it thrives in, as well as regenerate. This is especially true of the fungi and algaes. If you take all of them, instead of leaving some, you are diminishing the crop down to nothing and directly impacting the environment negatively.

reduce your food costs by foraging summary

Ultimately, foraging is a great way to reduce your food costs and increase your diet’s biodiversity. Plus, you’ll be getting outside to get some exercise and fresh air, which is also great for your health. We’ve been able to reduce how much fresh fruit, mushrooms and herbs we’ve had to buy from the store vastly. And by doing so, we’ve cut our food costs, because these things can get pretty pricey. Plus, they taste so much better when they are freshly picked. So it’s a win-win all the way around.

Have you ever tried foraging to help reduce your food costs? If so, what has been the best thing you’ve found so far?

How to Make Homemade Craft Coffee on a Budget

If you’re like me, you love a good cup of craft coffee. But I really hate the price tag that’s associated with them when I’m out. So, I’ve been working hard to create my own craft coffee on a budget at home. This way I don’t have to spend nearly as much money, I can make them anytime I want to, and the ingredients are better. This is what I call a triple whammy! In order to do this effectively though, I’ve found a few tools that are necessary to have in my craft coffee arsenal.

1. FRENCH PRESS

I used to be an drip coffee maker kind of person, since that’s what I grew up with. But, I learned fairly quickly that the coffee those produce don’t taste nearly as good as that from a French press. Since I’ve found this, it changed the way I make and drink my coffee.

There are a few different ways you can go with the French Press. When I first got started, I went with a more budget friendly Bodum French Press. This one only cost me $30 at the time and worked fantastically well for my initial foray into homemade craft coffee. I more recently moved into the more expensive Frieling Double-walled Stainless Steel French Press. I bought this one for $100 but had a 20% off coupon, so it came in at $80 instead. And, it has a lifetime warranty and won’t break if you drop it. Even though the French press appears to be the most expensive part of making homemade coffee, it is totally worth it.

2. TEA KETTLE

If you don’t already have a tea kettle, this is the next thing you’ll need. It’s necessary for the French press, and if you want to add delicious homemade teas to your culinary repertoire also. While tea kettles can range widely in price, I was able to find one for un $15, which also matches my kitchen perfectly. you will need one for delicious homemade coffee.

No matter which tea kettle you go with, make sure it holds enough water for your French press.

3. GOOD COFFEE BEANS

Since everyone has different flavor preferences, the coffee beans are going to be indicative of that. I personally, like espresso beans for a more full-bodied flavor. No matter which beans you go with, you’ll want to go with whole beans instead of ground. First of all, they are cheaper than grounds. Second of all, the grind for a French press needs to be a larger espresso grind instead of what you normally run across in previously ground coffee.

Plus, if you are using already ground beans, the oils start to oxidize faster. This means you are losing flavor in your coffee, as well as potentially getting a more acidic roast.

Therefore, I suggest either getting a small coffee grinder to grind the beans each day, or by the bag, which is what I normally do. If you don’t have the time for that, or want to save money and not purchase a grinder , grind them at the store with the espresso grind. Then store the ground coffee in the cool, dark cabinet to slow and/or stop the oxidation process.

3. craft coffee on a budget accoutrements

One of the big perks about homemade craft coffee is that you can put whatever kind of accoutrements you want in there. Since there are so many choices these days, the sky is basically the limit. Some of my favorite options to have on hand for my craft coffee are:

Creamers:

  • Almond Milk
  • Cashew Milk
  • Coconut Creamer
  • Coconut Milk
  • Dairy Creamer
  • Golden Milk
  • Hemp Milk
  • Milk
  • Oat Milk
  • Rice Milk
  • Soy Milk

I prefer to use unsweetened coconut creamer because it adds just enough creaminess without the added sugar, so I can actually taste my coffee.

Flavorings:

  • Bitters
  • Carmel sauce
  • Chai tea
  • Essential oils
  • Honey
  • Hot chocolate
  • Peppermint chocolate
  • Vanilla

The sky is really the limit here. So get creative with what you might have on hand.

4. MINI WHISK

When it comes to making good homemade craft coffee on a budget, a mini whisk is a must. Luckily, we happen to have a plethora of kitchen tools lying around, so we had one on hand. Since we have different sized coffee mugs and travel mugs, I found that I really like this 3 piece set of whisks for a little over $5. It comes with a smaller 5.5″, a 7″ and a 9″ for those larger mugs. Plus, you can use them for cooking too, which really makes this a great purchase.

Typically, the mini whisk comes in handy with craft coffee to help get that frothy top at the end. Just add sweetener, creamer, and/or flavor additions to the cup first while the water is getting warmed up. I use the whisk to whisk everything together prior to pouring in the coffee. This helps create a creamier and frothier coffee drink than I would normally get otherwise.

HOMEMADE COFFEE on a budget SUMMARY

Overall, there are so many things you can do to create delicious homemade craft coffee on a budget, that it’s hard to tell where to stop. Most of us will have a lot of these items already on hand, but the biggest investment is probably going to be a French press if you don’t already have one. Once you have that, and a tea kettle, it’s time to get creative. And by getting creative at home with your coffee, you can save yourself a boatload of money on drinks that may even be better than what you’d get out at a coffee shop.

What are some of the best ways you’ve found to make homemade craft coffee on a budget?

My Favorite Frugal Immunity Booster

When it comes to cold and flu season, there are a lot of things we can do to help keep ourselves healthy. But, even the strongest of us can sometimes use a boost. Even though I very rarely feel off kilter at all, there are times that even I need a little help. And when this happens, I go to my favorite frugal immunity booster to kick things before they really begin.

Apple Cider Vinegar

The first and foremost ingredient in any immunity booster I use is apple cider vinegar. While I have never been a huge fan of any vinegar taste, or smell, I can tolerate this one a bit better than most others. It helps that I only need to use about 1 Tbsp of it per warm drink at a time.

Apple cider vinegar has a ton of immunity boosting properties. Some of the most potent and common are:

  • Antimicrobial due to high level of acetic acid
  • Antiviral
  • Helps lymphatic drainage
  • Helps restore a more alkaline pH
  • High in antioxidants
  • Improves circulation
  • Prebiotics that help boost microbiome immunity
  • Reduces blood sugar levels
  • Reduces inflammation
  • Thins out respiratory mucous
  • Weight loss assistance

This list of benefits is pretty darn long and shows that apple cider vinegar can really help total overall health. And when it comes to buying apple cider vinegar, you want to make sure to purchase one with the mother in it. Since the mother is the healthiest part of the apple cider vinegar, you want to make sure you have one with it. If your apple cider vinegar is cloudy then you can bet the mother is still present.

And, in addition to that, I always go organic to help avoid any potential pesticides and herbicides that might still be present. After all, those would negate the positive immunity boosting properties of the apple cider vinegar to begin with.

Spices

I may start my immunity booster out with apple cider vinegar, but that isn’t where it ends. To help complete my powerhouse, I usually add the following spices also:

  • Cinnamon
  • Turmeric
  • Ginger
  • Cayenne

I suggest starting with 1/4 tsp of each to see how you handle the effects and the taste. As not all of us are fond of all 4 of these spices. I know that I generally prefer much less cayenne and ginger than the other 2 in my drink. But, all of these are added for a specific reason to help boost immunity. These are:

  • Cinnamon is high in antioxidants, antiviral, antimicrobial and anti-inflammatory properties
  • Turmeric is high in curcumin which is a strong anti-inflammatory
  • Ginger has many anti-oxidative and anti-inflammatory benefits
  • Cayenne contains capsaicin which can help reduce inflammation and treat colds and congestion
  • Add a bit of each to your apple cider vinegar in a mug and either stir or whisk. I personally prefer whisking because I feel that it gets a more uniform distribution throughout that way.

A Touch of Sweetness

After I have my apple cider vinegar and spices, a bit of sweetness is next. The best go-to I’ve found is local honey, but you can also use organic agave instead if you prefer. When it comes to boosting immunity though, local honey is a much better option. The reason is due to the fact that local honey tends to have:

  • Antibacterial properties
  • Antifungal properties
  • Antimicrobial properties
  • Antioxidants
  • Helps heal wounds
  • Can alleviate allergies to local allergens
  • Assists with sore throats
  • High in phytonutrients

As if these potential positive side effects weren’t enough, buying local honey helps local farmers. And I am always a fan of that! I usually only add between 1/2 – 1 Tbsp to each cup of my immune boosting drink, but you can add as much as you’d like. I would suggest less is more here though because you don’t want to risk spiking your blood sugar, as that would have the opposite side effect you’re going for.

Immunity Booster Summary

Once I have all of my aforementioned ingredients, I then add boiling water from a tea kettle and stir. If you want to get really fancy, you can add an apple slice and/or use a real cinnamon stick to stir it with instead of adding cinnamon powder.

Overall, this drink costs me very little to make, depending upon which ingredients I choose to purchase. And, since it is such a powerhouse when it comes to boosting my immunity, it helps to keep me well all winter long. By doing so, I eliminate trips to the doctor for weather related illnesses and am able to keep more money, and time. I call this a winter win-win!

Have you tried a drink like this to help boost your immunity? If so, what were the results?

How to Create a Frugal and Delicious Salad Dressing

If you’re someone, like me, who loves a good salad, then this article is for you. I detest the store bought salad dressings. Not only are they much too expensive for what you get, but I am not a fan of the ingredients. Plus, when you make your own salad dressing, you can give it any flavor you want. And for so much cheaper, and healthier, than any of the store bought stuff. So, if you want to make your own delicious salad dressing, frugally, then read on.

Olive Oil

When it comes to a good salad dressing base, olive oil is the way to go. Not only is it full of good healthy Omega 3 fats, but it’s extremely diverse. There are many different types of olive oil you can go with, so the price points will vary. I typically prefer to use Extra Virgin Olive Oil from the Greek region when possible. Sometimes I’ll go with the Italian olive oil if I can’t find any of my usual Greek stuff.

Usually, I’m able to find a few different options at Trader Joe’s. More often than not, I will spend between $6.99 – $8.99 for a bottle. This bottle can typically last me close to a month. But, if you want to get really fancy, and your budget will allow it, you could check out one of the olive oil and vinegar stores. This option is a big splurge for us. But, every now and then we get a wild hair and decide to purchase some of the flavor infused olive oils.

Balsamic Vinegar

Once you have your olive oil sorted out, next comes the balsamic vinegar. I can tell you that I was not a fan of vinegar for the majority of my life. Until my spouse opened my eyes to the fact that not all vinegar’s are created equally. I had apparently only been exposed to more of the table vinegar, which is not nearly as flavorful as balsamic is.

Once he opened my eyes to the diverse, and robust, flavor profiles of balsamic vinegar, my world changed. Currently, we have 5 different balsamic vinegar choices to use in our salad dressings. We have:

  • Mission Fig
  • Neapolitan Herb
  • Plum
  • Oak Aged
  • Cherry Wood Aged

All of these have completely different flavors and work well with certain foods. My two favorites currently are the Mission Fig and the Cherry Wood Aged because I love the little bit of sweetness they have that the others don’t. Depending upon what I put in my salad is how I determine which option might work the best.

And just like with olive oil, balsamic vinegar prices can range widely. The 5 we have range between $4.99 – $12.99 per bottle. So, if you haven’t dipped your toe into the balsamic vinegar land yet, it might be best to start out with one of the cheaper options to see if you like it. I can tell you that the more expensive ones tend to be a bit more balanced and smooth though.

Spices

After you have the olive oil and vinegar worked out, the last thing to add are your spices. A lot of people only think about adding salt or pepper to their dressings. We don’t actually add either regularly. In fact, I never add salt of any kind to my salad dressings. Sometimes I will add some cracked black pepper. But, typically I like to add some spice blends that are already made because they change the flavor so much.

I get a lot of my spice blends from Trader Joe’s. They do a good job of creating some delicious, and interesting choices. Plus, all of their spices are pretty darn frugal. My favorites recently are:

  • 21 Salute
  • South African Smoke
  • Chili Lime Seasoning Blend
  • Cuban Style Citrusy Garlic
  • Ajika Georgian Seasoning Blend

Out of all of these, my two favorite go-to’s lately are the 21 Salute and the Ajika Georgian. The former is a bit more on the herby side, while the latter is more on the smokey side. And most of the time I can find these spices for somewhere between $2.99-$3.99.

How to put together your salad dressing

How you choose to put together your salad dressing is completely up to you. But we typically do it one of two ways. The first way we make it is our most common since it makes things easy to switch up daily.

All we do is pour some olive oil on the salad greens, followed by the balsamic vinegar of our choosing. Sprinkle the spice blend on top of that and use your hands to mix the whole thing around.

If you want to make a larger batch, then I suggest a 3:1 proportion of olive oil to balsamic. Then add your spices to taste. Put all of this in an old salad dressing container or empty bottle that will store well. Shake it up and pour over your salad. Since all of these items are shelf stable, you don’t need to refrigerate this dressing either.

Salad Dressing Summary

Overall, it’s exceptionally easy to make your own salad dressing that’s both delicious and frugal. Just mix all of your ingredients together and mix up with your salad greens. If I purchase my ingredients on the lower end of the price points, then I’m looking at somewhere around $15 for a good month of so of salad dressing. Maybe even longer if I stretch it out, since you don’t need as much of this type of dressing. A little goes a long way with the olive oil based dressings.

If you’ve tried making your own salad dressing before, what has been your favorite way to make it frugal, delicious and healthy?

How to Frugally Feed Your Dog, Yet Well

When it comes to being a pet owner, there are so many ways to feed your dog that it can make my head spin. The amount of misinformation floating around out there is mind blowing, to be honest. Plus there’s the amount of dog foods and treats that are exceptionally overpriced but really not great for your dog. It’s amazing to me how many choices there are today, and how little cohesion there is between experts as to what is actually good for your dog.

Luckily for me, I have an educational background in this specific area. So, when we got a puppy last winter, it was much easier for me to weed through the noise. And by doing so, I’ve been able to find the best options for puppy, and all other dogs and cats we help through our business. So, the following are my best tips to help you frugally feed your dog, yet well.

Dog snacks

Besides dog food, the first thing I think of when it comes to feeding dogs are snacks. Most people only think of treats. But treats should be just that; only a treat. With dog snacks, these are things I add in regularly throughout the day or week to supplement feeding time. Plus, a lot of these work really well for training dogs too.

My favorite go-to dog snacks (always organic as long as I can find them) are:

  • Baby carrots – high in Vitamin C, Antioxidants, Fiber and Potassium
  • Sugar snap peas – high in Vitamin C, Vitamin K, Antioxidants and Fiber
  • Green beans – high in Vitamin C, Vitamin K, Folate, Silicone and Fiber
  • Beets (all colors) – high in Vitamin C, Vitamin B9, Iron, Fiber and Potassium
  • Salad greens – high in Magnesium, Vitamin A, Vitamin C, Fiber, Folate, Calcium and Beta Carotene
  • Nuts (usually peanuts or chestnuts, but sometime also walnuts, pecans, cashews and/or pistachios) – with all nuts, they shouldn’t be given too many of them but can be an addition to other snacks. I usually only give nuts maybe once a week or so, and even then only 1 or 2. Nuts are high in protein and can have a lot of other health benefits. But they can also cause issues if there is mold cross-contamination or if your dog has any gastrointestinal issues or are prone to swallowing things whole.

food additions

When it comes to dog food, that is probably a completely different article. However, since dog food can be so expensive, I’ve found ways to stretch it further. By adding some good, healthy food additions to my dog’s food, I am able to save a lot of money. Plus, I’m able to give her some added diversity in her diet. By creating diversity in my dog’s diet, I am assisting her gut microbiome health. And this directly impacts her overall immunity and wellness.

I not only add some of these food additions to our dog’s diet, but also for some of the dogs we watch. This is especially true of the older dogs or dogs who already have some health issues.

  • Organic beef broth – fantastic for dogs with arthritis or any other joint issues
  • Brown rice – high in Fiber and Magnesium, plus it stretches the food out much further
  • Organic low-sodium vegetable broth – perfect for introducing more vegetables into your dog’s diet and stretching their food further
  • Coconut oil – great for skin, coat, eyes, teeth, digestive tract, immune system, breath, etc
  • Green sauce (we make it out of organic beef broth and parsley, but sometimes add in some rosemary also if we have any fresh growing in our garden) – this helps tremendously with dogs that have UTI’s digestive issues and/or arthritis.

Our puppy gets a tablespoon of coconut oil added to one of her meals a day. She has had this since the day we brought her home. We have also added some beef broth into her meal a few times a week for added diversity.

dog treats

Dog treats should be treated just like dessert for us humans. And most dog owner’s have a tendency to give way too many treats. When doing this, you can cause a lot of harmful side effects for your fur baby, on top of the most common, obesity. Therefore, if you want to give treats, that’s awesome, but limit them to just treats.

We only give treats very sporadically so that they aren’t an expected part of any routine. We did use them more when we were housebreaking our puppy, but that is generally to be expected. Outside of that, I only give them sparingly. And I make sure they are high quality treats and not full of junk.

That being said, I am not a huge fan of most dog treats on the market. But a few of my favorites are:

While these may seem a bit pricey online, I’ve actually been able to find them for dirt cheap at Marshalls, TJ Maxx and Homegoods. So I would suggest roaming the pet aisle there regularly to see what treats you can find to feed your dog.

frugally feed your dog summary

Ultimately, when it comes to feeding your dog, there are a lot of different ways you can save money. While we all love our dogs, we don’t have to break the bank to do it. So, just remember to add in some:

  • healthy snacks
  • good food additions to stretch your budget further
  • healthy dog treats

If you’re able to do even one of those, it should not only save you some money, but also create a happier dog. Now who doesn’t want that?

How Getting an Air Fryer Has Saved Time and Money

We’ve been holdouts on the air fryer hype. It’s not that we didn’t necessarily see the potential. It’s just that we have so many kitchen appliances and gadgets already. And we didn’t know if we really wanted to spend more money on something we might only use occasionally. But, a few friends convinced us to research them some more. We were told that getting an air fryer has saved them a ton of time and some money also. So, after some research, we decided to dive right in.

Deciding which air fryer to get

The first thing we had to decide was which air fryer would suite us best. Since we have 5 kids, we knew we would need something a bit bigger than the norm. One of our friends has a two basket air fryer. But the $400 price tag was a bit more than we planned to spend on an experiment. After all, we were hoping to use the air fryer to help incorporate even more healthy foods for the kids. But we didn’t want to spend an arm and a leg to do so.

Another friend told us about the air fryer he had. While it only had one basket, it was a larger basket than most other air fryers. Plus, it was a multi-function tool also. This particular air fryer could replace the toaster and the oven. It could bake, broil, toast and air fry. Which was pretty cool in our book!

Therefore, we ended up getting the Cuisinart TOA-60 for under $200. Which was half the cost of the other one we were recommended! We chose the black stainless steel color because all of the other appliances in our kitchen are either black or are being converted to black.

How it has saved us time

So far, this thing has saved us an amazing amount of time. This is due to the fact that it cooks so much faster than our double oven does. Plus, we don’t have to wait for it to heat up either. As soon as we put food into the air frying basket, we can pop it in. We just choose the setting we want, the amount of cook time and then turn it on.

A great example of this is sweet potato fries. Normally, it takes our oven about 10 minutes to heat up. Then, the fries have to cook for anywhere between 22 – 28 minutes. But with our new air fryer, they only take 10 minutes to cook, max. And no heating up time required!

We can also prepare meals faster with it because we are using it in addition to our oven. When we have multiple dishes that need to be cooked, we choose the longest cook time items to go in there. This way we are able to get the food out faster, so we spend more time with our family instead of in the kitchen.

And the clean up is super fast also. The fryer basket comes with a pan underneath it that we just take out and clean with warm soapy water. Or, sometimes we put foil on the pan to make clean up even faster.

How it has saved us money

Let’s face it, electricity costs money. And if we have to wait for our oven to preheat for at least 10 minutes, plus add in the cooking time, that’s a lot of electricity being used. Since we are trying to cut down on our electricity bill, it only made sense to try out the air fryer.

By cooking what we can in the new kitchen device instead of our old oven, it has saved us money right out of the gate. The air fryer cost less than a new more energy efficient oven and it has a lot of space for cooking. Plus, it cooks in anywhere from 1/4 – 1/3 the time of our oven. And it pulls less power to operate also. So, we are interested to see if our next electric bill reflects this change.

Air Fryer summary

Ultimately, we are thrilled that we finally took the leap to get one of these bad boys. If you are thinking about taking the plunge, it’s best to determine your needs first. There are so many different sizes, looks and versions on the market. Therefore, there is bound to be a good fit for you within your price range. And even though $200 was more than we originally wanted to spend on an air fryer, it has totally been worth every penny. We just can’t get enough of this thing!

Have you bought an air fryer yet? If so, how has it helped you save time and/or money?