


This post originally appeared in January of 2014. Since gardening time is near, I thought we’d re-run it for any new-to-gardening readers. Enjoy!
Happy Friday, friends!! My dear friend Michelle, whom I secretly call my cooking and gardening extraordinaire friend, agreed to write a post for us on the basics of gardening for beginners. This gal amazes me, simply because the things that she does, she does very well. She’s a superhero in all things pertaining to house and home. She’s an amazing cook, her house is fabulously decorated, and she’s a pro and growing and preserving her own food, on top of being super sweet. So, my friends, gather up all of the gardening wisdom you can from this wise woman!
Over at RockinTheMomRole.com my motto is ‘Living, Life and Loving Both’. I try to educate, inspire, and enlighten on all things domestic. So, when my dear friends at Frugal Farmer asked me to share some of my home gardening tips, of course I said yes!
Recommended reading: Mini Farming: Self-Sufficiency on 1/4 Acre
Today we are going to discuss beginning your own home garden.
To begin with, I think you should determine why you are growing your own food. There is nothing really challenging about gardening, but it takes labor, dedication, and mindfulness through the entire growing season. Then, that is followed by putting that food up for longer term storage (if that is one of your goals). If your gardening plan is based on a whim, your garden will fall by the wayside, become overgrown and fruitless.
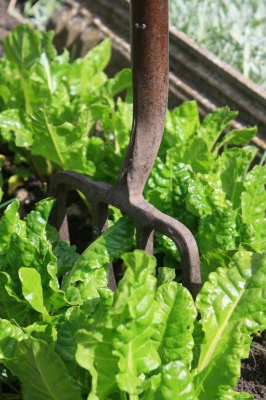
Secondly, decide what it is you really want to grow. What produce do you buy regularly at the grocery store or farmers market? What is it your family will eat? If no one likes rutabaga, don’t plants rows of it. It might be fun to grow a plant or two to try, but don’t invest in an entire crop. Determine what you want to grow for your table, and what you want to put up for winter storage. How is that processed? Do you have recipes that sound appealing? What kind of canning does it require? Do you have the proper storage equipment? For some produce you will freeze and put in long term freezer safe materials (like Food-Saver or freezer Ziploc bags). Other storage methods are water-bath canning and pressure canning. If you lack freezer space and want to put up shelf stable garden veggies, you will need a pressure canner to safely store low acid items like corn, green beans, carrots and peas. If you are putting up high acid/sugar items like tomatoes, tomato sauce or salsa, jams, chutneys, a water bath canner will suffice. The benefits of growing your own are numerous, but for me, eliminating dangerous pesticides, money-savings, and the ability to grow difficult-to-find heirloom varieties, are highest on my list.
When you have decided what you want to grow, you need to determine when the seeds need to be started based on date of maturity, and germination time. For veggies like tomatoes and peppers, I find it very helpful to start them indoors in February/March to give them a head start. In a climate like Minnesota, we have a very short growing season, and tomatoes need to set their fruit before temperatures rise above 90 degrees, or be timed to set fruit AFTER those hot temps. (Tomatoes will experience ‘blossom drop’ if the day heat gets too high, that means loss of fruit and reduced harvest) In my experience, peppers also take a long time to mature, especially if you want them to ripen to red, yellow or orange peppers and be able to harvest before the first frost. Once you back in to when you should start your seeds, then you are ready to begin.
There are many ways to start seedlings indoors. If you are new to this experience, start simple before you invest in a lot of seed starter equipment. It can be as simple as using a cardboard egg carton, cutting a drainage hole in the bottom and putting in some seed starter dirt. (Seedling dirt is different- it has little if any fertilizer in it, which would cause seedling roots to burn) It can be as complex as purchasing seedling trays, and dirt discs that are rehydrated in water, warming mats, and grow lights, which are helpful for mass production. It all depends upon how serious about this you are, and what size garden you are planting.
Once you have your seeds planted, then you need to ensure that they are warm enough for germination. The seed package will tell you what temperature that is. (The internet is also an excellent resource for this information) When I started, I put the plastic lined trays on top of a large absorbent towel, then put a heating pad/blanket under the towel and set that up to a timer. I would have it turn on and off to generally maintain the soil at the desired temperature. If you keep your house warm, you won’t need a warming blanket. If you have a South-Western window that is warm, I’d put my seeds there. If you have access to a grow light, you can set up your system in any room of the house.
A couple of things to remember, and tips I’ve learned over the years in seed starting:
If using grow lights: start them close to the surface of the soil. I put mine (they are the fluorescent tubes and have hanging hooks on the housing) on an adjustable chain, so that I could raise and lower the level depending upon the seedling growth. Your goal is to maintain the light at an even height above the plant, about 3-6 inches. If you start out with the lights too high, the seedlings struggle to grow up to the light, growing too fast, and the result are leggy, weak plants. You want hearty, strong plant starts so don’t rush them.
Use a fan: I cannot stress the importance of this little talked about tip. When your seeds start outdoors, they are subjected to breezes and winds that move their little stalks about. This strengths them – think calisthenics for plants! When we start them indoors, there is no breeze to move the stems and strengthen them. Some recommend brushing the seedlings with your hand periodically during the day, but I find that cumbersome and a time waste. I simply set up a rotating fan to wave a breeze over the trays. You can also set this up with a timer to go on periodically throughout the day and night. This little tip, which is so overlooked, can be the difference between a successful transplant and a frustrating failure.
Watering: Your new little ‘babies’ are tender and delicate. You wouldn’t give your infant a steak and potatoes meal, and neither should you overwhelm your seedlings. I use a clean spray bottle to gently mist the soil with pure water, and keep it slightly damp. Do not let the soil dry out. That can create a tough barrier that the seedlings find difficult to sprout through. Do not over water, as that can cause the soil to mold and mildew. It is a balance. Moist, but not damp. That is why the misting bottle is so helpful. Once your seedlings sprout their first true leaves (the second set of leaves to sprout), you can gently begin to water them. Just be careful, since they are still fragile and you don’t want to loosen their hold on the soil. Also, it’s important not to over water, as that can cause the soil to mold and mildew. Water timers for hoses can help with this problem.
One of Amazon’s most popular gardening books: The Vegetable Gardener’s Bible
Hardening off: Hardening off is another tip that is often overlooked and the cause for wilt and failure. Your little plants have been in a climate controlled environment since ‘birth’. They need a little time to adjust to being outdoors. As soon as the weather allows, you can start this process.
To start with: take your plants or seed flats outside, and put in a shady (no direct sunlight) spot for up to an hour per day, to begin with.
After a few days of acclimation, you can begin to increase the time. Increase this time by a few hours or so, until they are outside all day, all the while increasing their sun exposure also. (I place mine under a tree and slowly increase the time they spend out in the open) When you are sure there is no chance of frost, they can stay out overnight. I encourage you to include this step of ‘hardening off’ if your goal is for a fruitful and successful garden. Some people use ‘cold frames’ which achieve the same goal. A cold frame is a box on the ground with an opaque plastic top that is hinged on one side. The hardening off is achieved by gradually opening the lid to allow air and light in. The advantage is not having to haul your seed flats around all the time. Do some research and decide which is best for you.
For tomatoes and peppers, I like to keep growing them indoors under the grow lights until they are a nice, hearty size, about 8-12 inches tall, before I transplant. Other seedlings like lettuce, cucumbers, squash can be transplanted as soon as they start looking like a real plant, with at least 6-8 real leaves, and the outdoor ground and air temperatures are suitable. (Ground temps need to be above 50 deg and air cannot be frosting at night. You can use black plastic to warm the soil if needed)
(An alternative to indoor starts: if you use half gallon plastic milk jugs, cut in half, leaving attached by the handle and the lid on, and fill
with dirt. Plant your seeds, tape shut, and stick outside in the fall, after the first freeze. In the spring, the soil will thaw and the jug will create a greenhouse environment. This is perfect for cool weather greens like chard, spinach and lettuce. When they sprout, simply take off the lid, un-tape and begin to harden off by lifting the lid.)
Planting: There are a couple of things to keep in mind after planting:
Tomatoes: Tomatoes like warmer conditions, so if you are in a northern climate, you might want to invest in something like ‘Walls of Water’ or a Cloche. It creates a micro-environment like a greenhouse, which helps growth and protects from late frosts. It allows you to get the plant in the ground earlier than if planted without.
Carrots, peas, radishes, beets, and potatoes all do better direct sown in the ground when the ground temperatures allow.
Check to see what growing zone you are. That will determine average
soil temps and date of last frost. That will help you to back in to when to start your seeds and when to plant.
Stagger your starts and plantings for produce like lettuce, spinach and herbs like parsley, dill and cilantro. This way you ensure a constant supply, since the mature plants will bolt in the summer heat. (Which means: go to seed)
Lastly, you don’t need fancy equipment! Be creative and use what you have on hand. (Please keep common sense safety in mind. For example, put a plastic sheet over a warming blanket if using as a seed warmer. Water and electricity do NOT mix well together, EVER! )
Listen to your elders and fellow gardeners. The tips I have learned, that have most value, are from experienced gardeners and from the generation that had to grow ‘Victory Gardens’ to survive. They learned by failure and success, and I am more than happy to gain from their experiences.
Now is the time of year to be planning your garden. Grab those seed catalogs and start dreaming about a summer full of great eating abundance.
Michelle Venturo is a microbiologist who worked in catering, banking and sales for years before starting a family. She has been at home for nearly 20 years raising her family, becoming a self-taught expert in all the areas of domesticity. She has also begun sharing her food wisdom and skills with others as a personal Cooking Coach. Her blog ‘RockinTheMomRole.com’ is where she shares her 50 years of acquired wisdom, practical knowledge and experiences.


I SO wish I could garden in NYC. I do plant some basil in a pot that sits on the windowsill each year, but that’s about all I have room for.
Yeah, it’s definitely more difficult in the city. Do you have some south facing windows where you could do some tomatoes or peppers in a large planter pot?
I wish I can grow my own food, but to be honest, I’d probably not keep up with it.
I did add some apple seeds into water to let it germinate. The seeds are actually popping out roots and I plan on planting the seeds indoors in a little pot until it’s big enough to plant outside. I wonder if my experiment will be a success.
Free apples?! Woohoo!
Interesting, Charlie! You’ll have to let us all know how that goes. We have apple trees in our yard, and I can’t tell you how fun it is to run out front and grab a fresh apple off the tree. 🙂
This is great! I would like to start a indoor herb garden this year. Any tips specific to herbs? I’d like a tomato plant as well. I live in a condo and I wonder if a balcony is sufficient…
I’ll have Michelle answer that one, Emily, when she gets back from the Superbowl. We specifically have done basil, lemon basil, cilantro and dill, but they seem to be pretty Jekyll/Hyde-ish as far as success goes, at least for me. 🙂
Great article. I love the suggestions, especially the one about starting seedlings in an egg carton. But why stop at just the carton? Those broken egg shells fit right in the carton and you can add some soil to the 1/2 egg shell, start your seeds in the shells and then transplant the whole thing. You’ll have free fertilizer.
Smart tip, Jim!!!! Friends, just make sure to poke a hole in the bottom of the eggshell half so that excess water can slip through. Thanks, my friend!
While we do have a yard we don’t really have much for gardening space. Most of our yard is heavily shaded. However I was thinking about starting a small potted herb garden this summer. I love rosemary and basil. I think this could be manageable!
I have wanted to start a garden forever! Because I totally get the financially smart aspects of it. Here are my challenges, New York suburb (i.e. cold, deer, and other animals); an indoor cat (who would eat indoor plants) and a black thumb. Is there any cure for me?
Try putting citrus peels, slinkies or foil around the base of your indoor plants. Cats don’t like those things and will avoid your plants if they’re there. We have seven (!) cats and don’t have any problems with our plants.
Smart tip, Anne! Thanks for sharing. 🙂
This was very helpful. Great tips I will use when starting my garden this year.
See, the thing about my mom and I is that she loves gardening while I absolutely hate it. I remember when I was a kid she used to get me to help her dig holes in the ground and all that. I, on the otherhand, LOVE grass. If someone dug a whole in the grass that I took care of in our backyard, I’d go beserk.
Great tips! I especially like the one about knowing your growing zone because being in Arizona not everything will grow here.
Deacon, I just saw a show last night about using waffle gardens in New Mexico for dry climate growing – you should look it up!
Being able to have a garden is literally one of my favorite things about owning a home. It saves money, tastes amazing, and it’s simply fun. There’s some trial and error, but after a couple years, we know what we can grow, and what we should probably steer clear from. I’m definitely going to share these tips with the wife!
LOL, so true about gardens – we are still in the learning process, but there is already a thing or two we know that we shouldn’t bother trying this year. 🙂
Thanks for sharing. 🙂 This is high on my list of things to do this year. I wanted to do it last year, but never got around to it. This year is going to be different. It should be an interesting experiment. Wish me luck!
Let us know anytime if you have questions. We’ve learned a lot over the last 3 years. Get yourself a good gardening book too – maybe the Veggie gardeners bible shared within the post, or check out your local library…. More on gardening and preserving later in the week!
We always had a garden growing up. I’d need to rearrange some things in my yards, take a tree down or two to fit one in now. 🙁
Yeah, that might be a little costly. 🙂 Do you have a deck or something where you can put a potted tomato plant or two?
I can’t wait to get our garden going. We missed out on one last year because we moved during the prime preparation time. But we really need to get going now, or we will miss it again! I’m also excited to try better long-term preservation techniques. Thanks for sharing!!
Excellent advice, we love our garden boxes and were able to build a drip irrigation system on a specific zone of our sprinkler system. There is nothing more satisfying than eating a ton of veggies that you grew yourself!
Now if we could only figure out how to keep the Armadillidiidae(rolly pollies,pill bugs)from eating the leaves and new growth. I hate those things!!!!
I just looked up Arma…..whatever bugs and YUCK – are they creepy looking!!! I also found this forum that talks about getting rid of them. Hope it helps! http://forums.gardenweb.com/discussions/2087174/how-to-get-rid-of-pill-bugs
I love gardening. Every since I’ve become a homeowner, every years, I’d go out and grow something. I love mint, and other herbs, because a lot of them keep on coming back each year and very low maintenance. 😛 No bug spray needed.
I hear you, Vivianne! We’re planning on planting mint for the first time this year, and I’m SO excited!! Fresh-grown tea, here we come!